Showing posts with label DIY. Show all posts

Tuesday, August 28, 2012

DIY: Wedding Card Box


Here's another fun and simple DIY project, it's not beauty related but in lieu of the wedding season, I decided to share anyway.

My mom got married this weekend and I wanted to add a personalized touch to the wedding so I decided to make her a wedding card box.
Hope you guys enjoy!!


Materials I used:

(2) paper mache boxes
Glue gun
Self adhesive rhinestones
Self adhesive pearls
Ribbon
Scissors
Artificial sunflowers
(2) cans of black spray paint
Pre cut cardboard letters
Sand paper

Step 1: Begin by spraying an even coat of paint on the boxes and the lids.

Step 2: Once the paint dries, cut a slit on the top lid. (I don’t know the exact measurements however I used an actual card envelope as my reference). After cutting the slit, sand it smooth and touch it up with a little more paint.

Step 3: Once the paint dries again, glue the bottom of the top box to the top of the bottom lid…hope that wasn’t confusing.

Step 4: Cut a hole where the two glued boxes are joined togehter so the cards can fall from the smaller top box into the larger bottom box.


From here you can begin to decorate the box as you wish. The flowers of the wedding were sunflowers so I wanted to incorporate that flower as well as the color scheme onto my box.  

Step 5: I glued pre cut/decorated letters to the bottom box reading: CARDS.


Step 6: I applied the self adhesive pearls on top of the top lid.

Step 7: I traced the letter “T” (which is the initial of my mom’s new last name) with a pencil and applied the self adhesive rhinestones along the traced letter.

Step 8: I cut the stems off the sunflowers and glued the flowers to the bottom lid.

Step 9: Finishing the box off, I glued the yellow ribbon to the base of the top box.
 I loved the way the card box turned out and most importantly I’m glad I could create something special for such a memorable occasion.

If you have a wedding coming up or know someone getting married, give it a try!!


Wednesday, July 18, 2012

DIY Beaded Stretch Bracelet

Stretch bracelets have become very popular amongst jewelery designers as they are sold practically at all retail stores. The tutorial below will show you how to make your own bracelets....it's super simple and fun!


Materials Needed:

Stretch Cord ( I used Stretch Magic in .5mm thickness, 1mm. is ok as well)
Beads ( I used plastic craft beads)
Charms (Optional)
Binder Clip ( Not shown in picture)
Scissors ( Not shown in picture)

Let's Get Started....
1. Cut the stretch cord at your desirable length.
2. Place your binder clip on one end of the cord securely.


3. Thread the other end of the cord through your beads. Leave at least 2 inches at the end of the string so you will have enough cord to tie your knot.
4. Tie the ends of the cord together in a secure knot. Below is a picture of how to tie a surgeons knot. You can reinforce the knot by applying glue if you wish.

5. Trim the excess cord and place the knot in the closet bead hole
6. Optional: To jazz the bracelet up some more you can add some dainty charms.


Viola!! How simple was that? The hardest part of the project is trying to decide which beads you're going to use!!

Thursday, April 19, 2012

At Home Face Mask


 Why not save some money and have fun making a face mask with ingredients found around the house? If you have oily, dry, or combination skin, there is a facial recipe out there for you. I’ve been feeling that my face has been dryer than usual so I was looking for a face mask that will hydrate and deeply moisturize my skin. I decided to try an avocado/honey/olive oil mask. Overall I was very pleased with the outcome as it left my face feeling as soft as a baby’s bum. If you will like to make your own face mask then stay tuned as this face mask is super easy to make.


Ingredients needed:

1/2 Avocado
1 tbsp Honey
1 tbsp Olive Oil

Mash the avocado in a bowl, try to get most of the lumps out.
I did think the avocado smelt strange but once you add the honey the smell gets better.

Add 1 tbsp of honey and olive oil, mix them all until you get a smooth consistency, it should pretty much look like guacamole.


Apply 2 layers on your face and leave on for ten minutes.


Rinse face with warm water and you have completed a very simple moisturizing face mask.


Hope you guys enjoyed!!

Saturday, March 24, 2012

Repurpose your old denim jacket into a rocker chic vest

I'm sure we all have that denim jacket in our closet that we no longer wear. Well before you decide to get rid of it try making it into a rocker chic denim vest. If you don't have a denim jacket, go to your local thrift store. The jacket below was purchased at my local Goodwill for $4.99. It's actually too big but I really wanted to try the look. Even though its big, I'm still going to wear it because the final product turned out to be absolutely gorg!!!


Let's begin......

Cut the sleeves of the jacket along the seam, get as close as possible and try to be as neat as possible.


Rubber band different sections of the vest. I used approx. 30 rubber bands. You should be left with one big ball.


You want to put your vest in a concoction of bleach and water. For every 1 cup of bleach add 3 cups of water. Now I thought this process was going to be fast but for me it wasn't. It took approx. 30 minutes of turning the vest over to get the look below.


Once you achieved the stain you like, wash the vest in the washer by itself and then put in the dryer. To spunk the vest out, add some studded jewels. Find some studs that you stick through the denim and fold the backs down. You can apply them wherever you wish, I decided to apply them along the shoulders of the vest. These studs can be found at your local craft stores. The studs below were found at Hobby Lobby for $1.67 with 30% off.....winning.


Once the studs are done, your vest is ready to be worn over a maxi dress or with a t-shirt and leggings. This vest has definitely become the statement piece of the outfit. For a more distressed look you can fray the collar and the breast pockets with a razor.


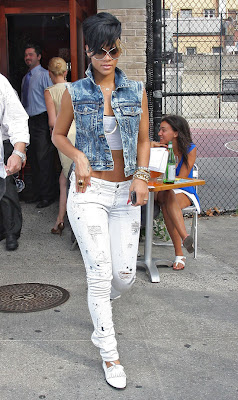
......Even celebrities love wearing denim vests.


Hope you enjoyed!!!!


If you tried this DIY, please send me pics as I would love to see.